I’ve been using Clonezilla a number of years whenever I want to clone a hard drive. The point of cloning a hard drive is to create a complete backup so that if things go sideways I have a way to restore to what I had before. I clone hard drives when I upgrade to a larger size or when I do a big software update like moving from Windows 7 to Windows 10. Cloning a hard drive allows me to keep all the software settings and applications installed as opposed to trying to remember which individual files are worth backing up and copying just those. The backup clone will also allow me to boot into Windows or whatever OS happens to be on the hard drive. Hard drive cloning can be rather time consuming, but if you want a complete restoration that allows you to boot and keep everything (applications and data files), it might actually be the quickest way. Just try and restore from “the cloud” if something goes wrong. It wouldn’t surprise me if it’ll take days if you can even restore in such a way. Local physical hard drive is still the way to go if you want fast recovery.
Create Bootable USB Drive
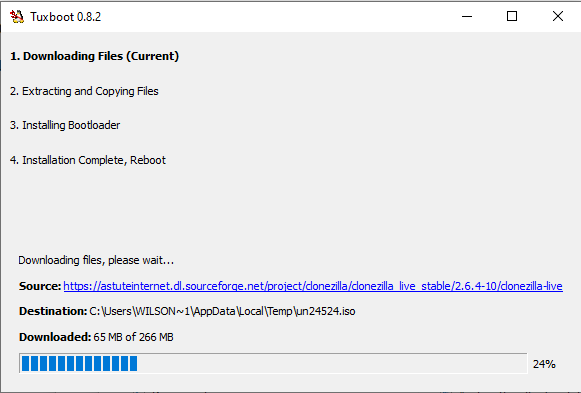
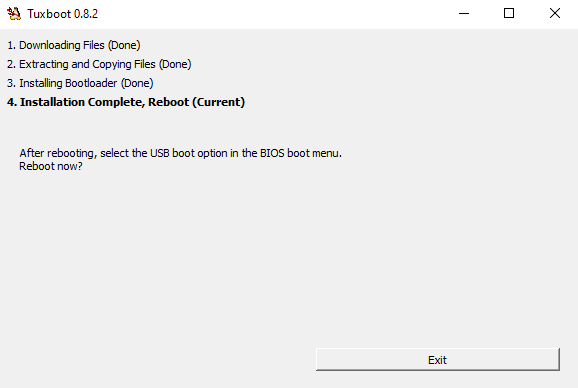
There are several ways to run Clonezilla and getting it into a bootable format, I currently like using Tuxboot to create a bootable USB key.
Download Tuxboot
Download and run Tuxboot
https://tuxboot.org/download/

Just click OK to create bootable USB key with Clonezilla
Connect the Hard Drives
You can create the USB key from any computer and you can also use a spare machine to do the actual cloning if the machine you’re trying to clone / backup doesn’t have a way for two hard drives to be connected physically at the same time.
Boot into Clonezilla Menu
This part can be tricky for some users, but that is beyond the scope of this article and I can’t help much. It is dependent on your specific machine BIOS / UEFI. You’ll need to find away to boot into the newly created USB key instead of the usual hard drive already installed. You may need to turn off Secure Boot if using UEFI. It might be as simple as bringing up the boot menu and selecting the USB key. Good luck!
Run Clonezilla
If you managed to get to the Clonezilla boot screen, then congratulations! If should be fairly straightforward from here. The top option usually works for me: Clonezilla live (Default settings, VGA 800×600)

Choose a language, I prefer English. For those not familiar with DOS-like screens, you may need to press the [TAB] key to get to the <Ok> button and use the keyboard arrows to navigate. Press the [ENTER] key to continue while <Ok> is highlighted.

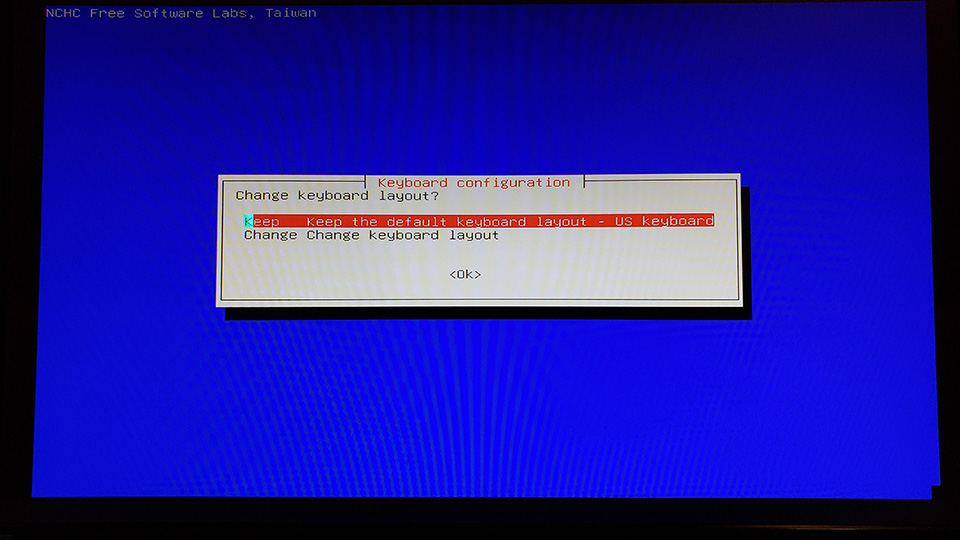
I’ve never tried to change keyboard layout and have always just left it as the default.
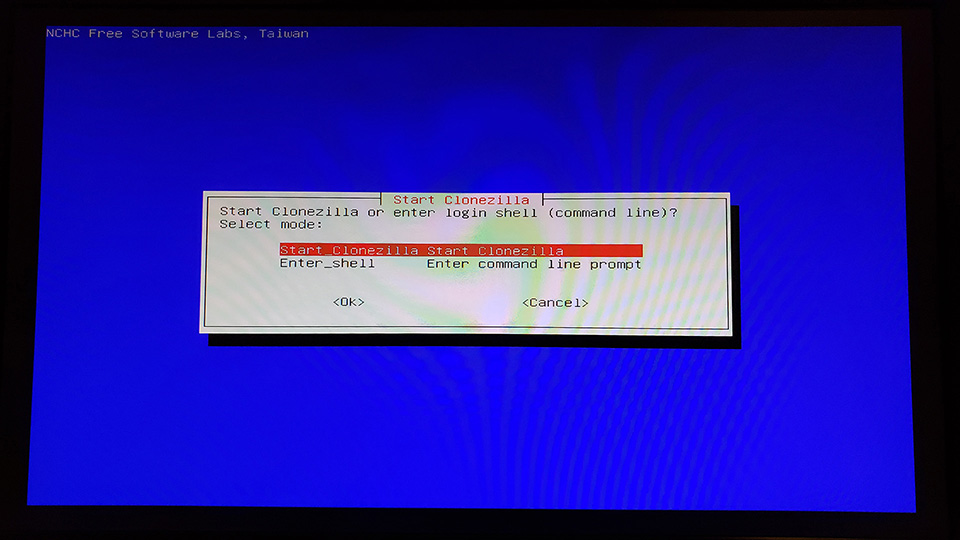
I like Start_Clonezilla as it pretty much just walks you through the process.
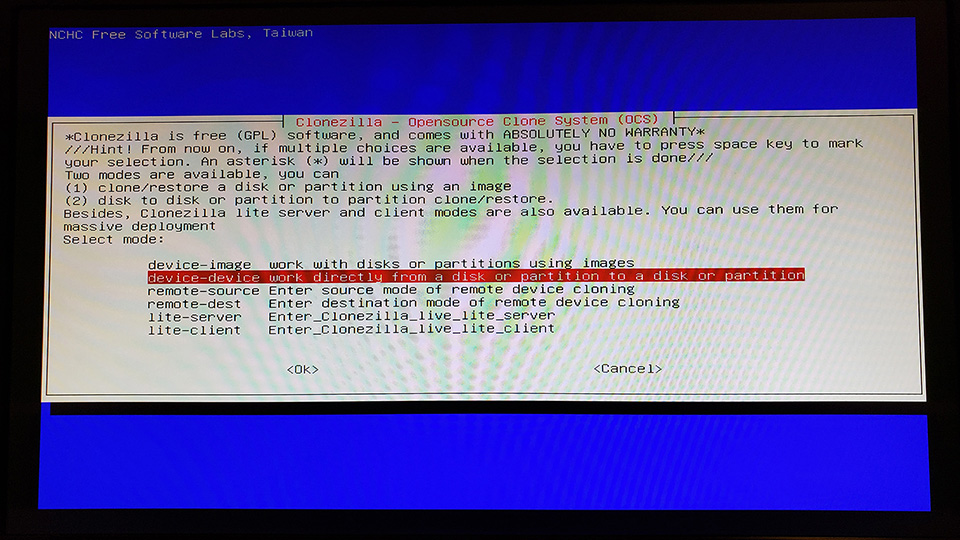
In this example of cloning hard drive to hard drive, select device-device.
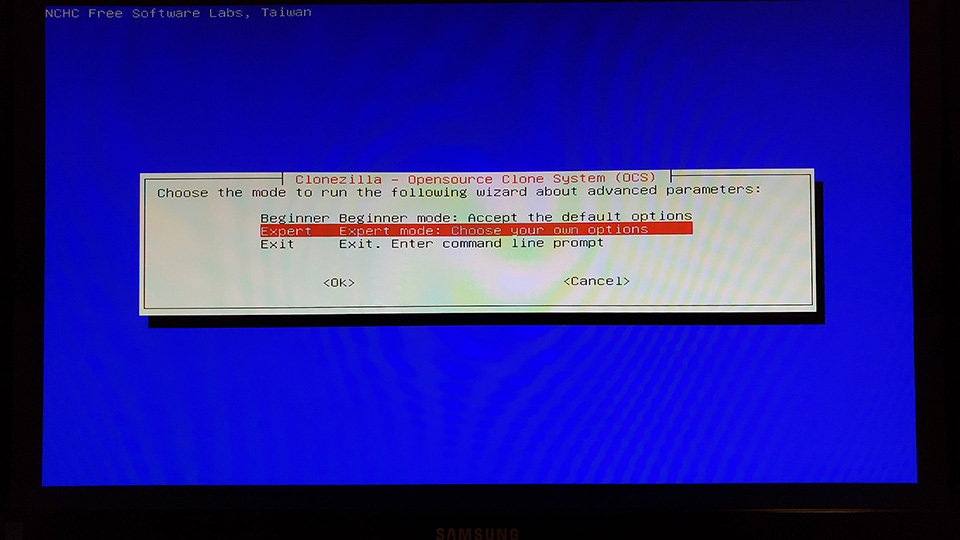
Select Expert mode, we need that for the create-partition-table-proportionally option.
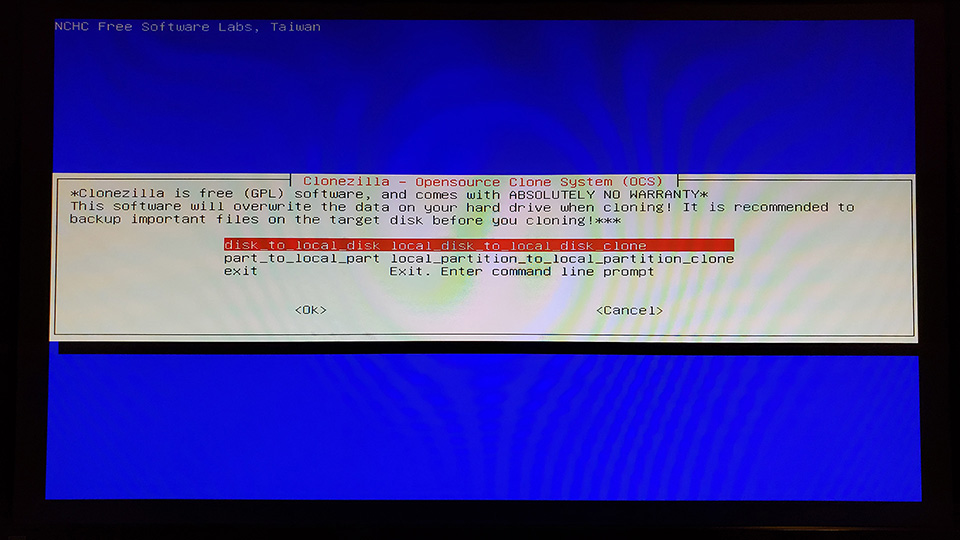
In this example of cloning hard drive to hard drive, select disk_to_local_disk.
Select the SOURCE disk that you would like to copy FROM.
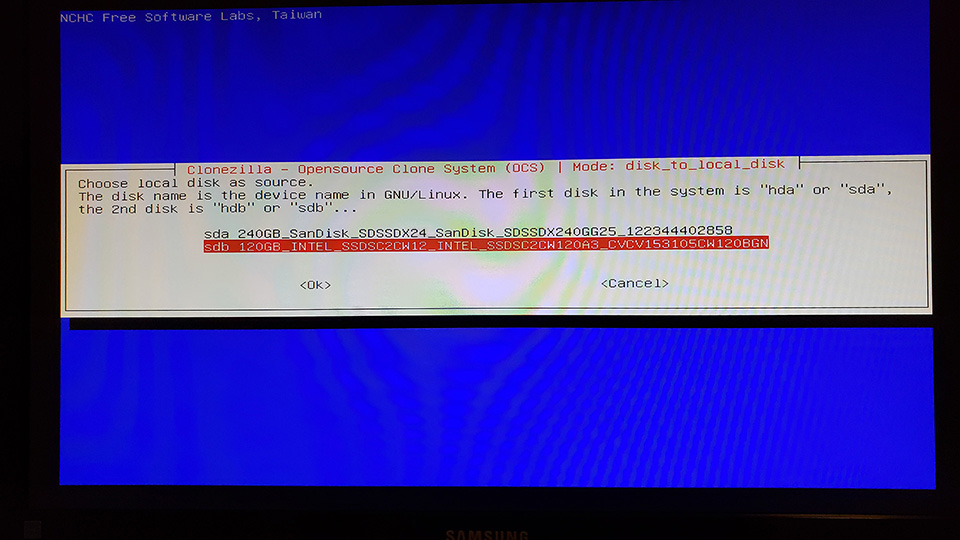
Select the TARGET disk that you would like to copy TO.

The default advanced parameters on this page are good and I haven’t had to change them.
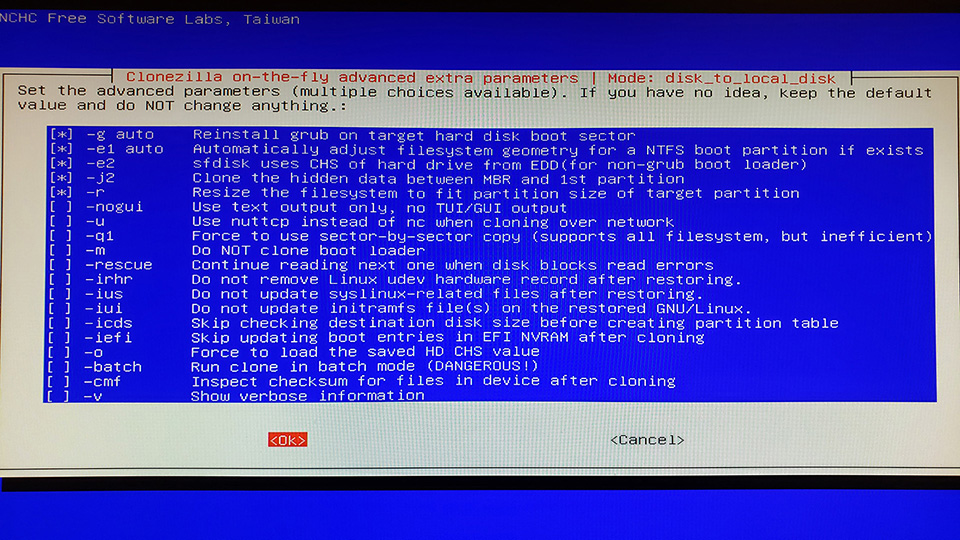
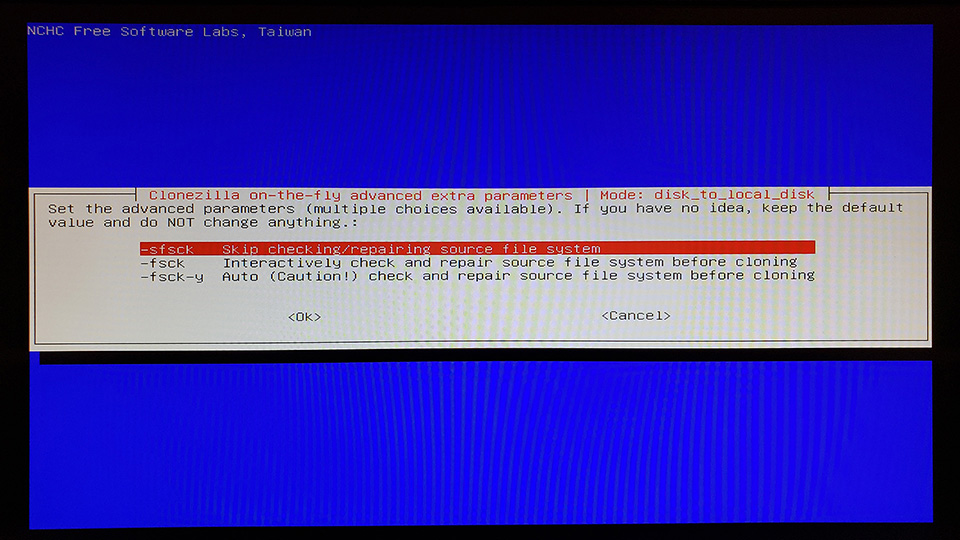
I select sfsck and skip fsck when cloning in the interest of time. I do however try to boot from and make sure the backup drive works first before messing with the original drive.
-k1 is what we need to create partition table proportionally. This is a very important setting when upgrading to larger hard drives and makes the new extra space usable as one big drive.

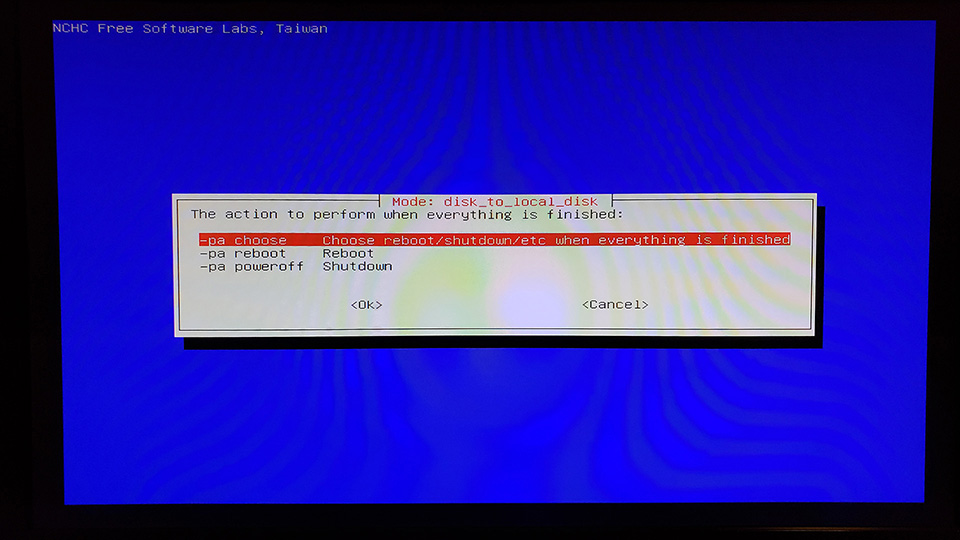
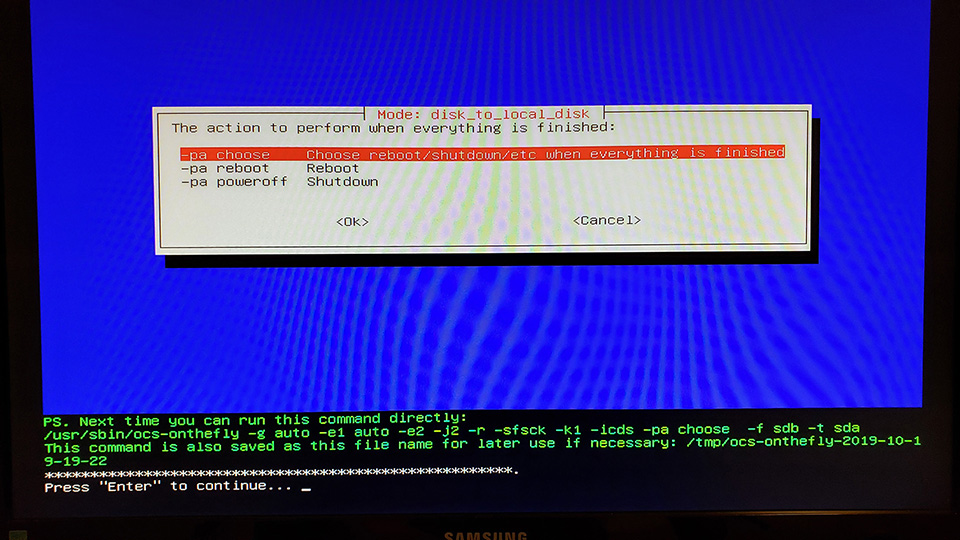
I like -pa choose so that I can later choose what happens when cloning is completed.
Finally, the settings are done, you can write this command somewhere if you feel like saving the exact command to run in the future. I would just refer back to this guide.
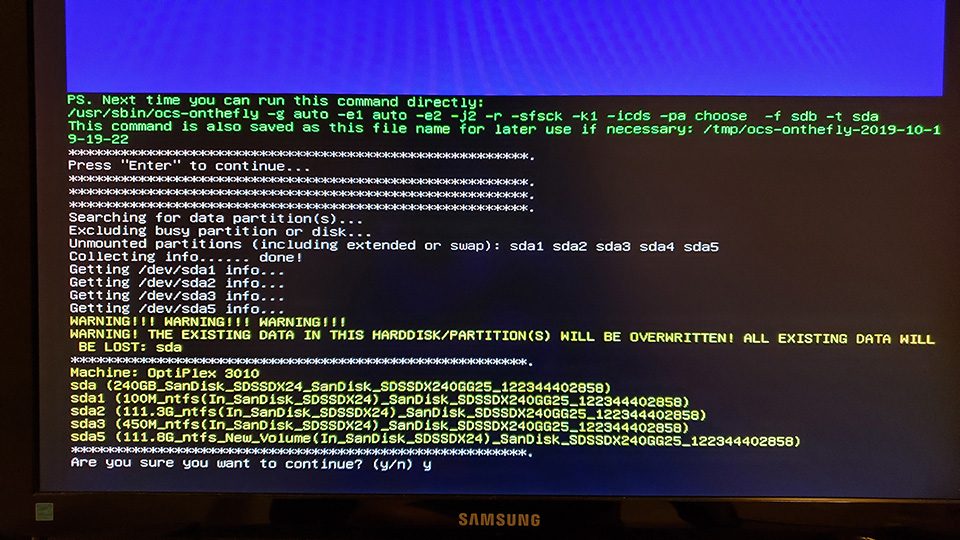
Check the TARGET hard drive. EVERYTHING on the TARGET hard drive will be LOST.
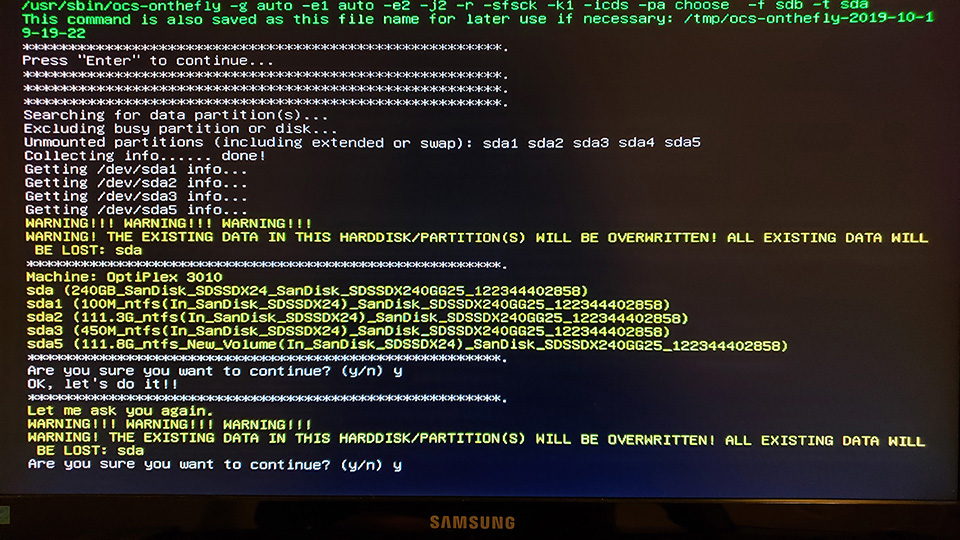
Last chance to double check the TARGET hard drive. EVERYTHING on the TARGET hard drive will be LOST.
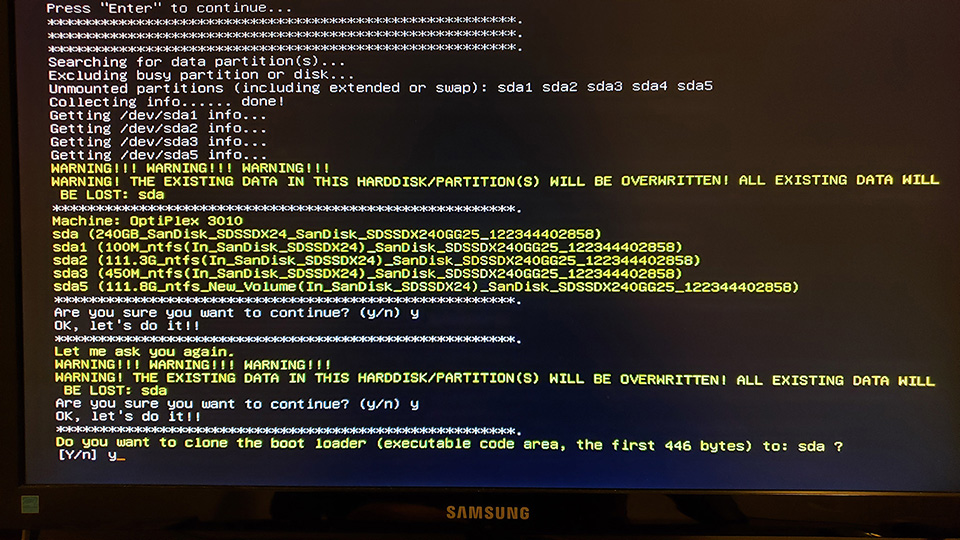
I just say yes to cloning boot loader as I’m usually dealing with single hard drive machines and want the target hard drive to boot.
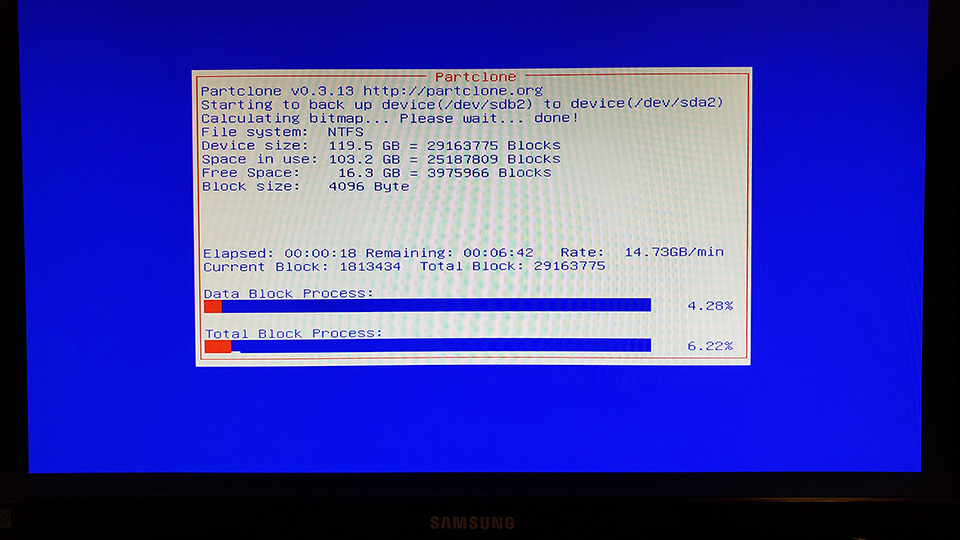
We’re in business! The cloning progress is finally underway.
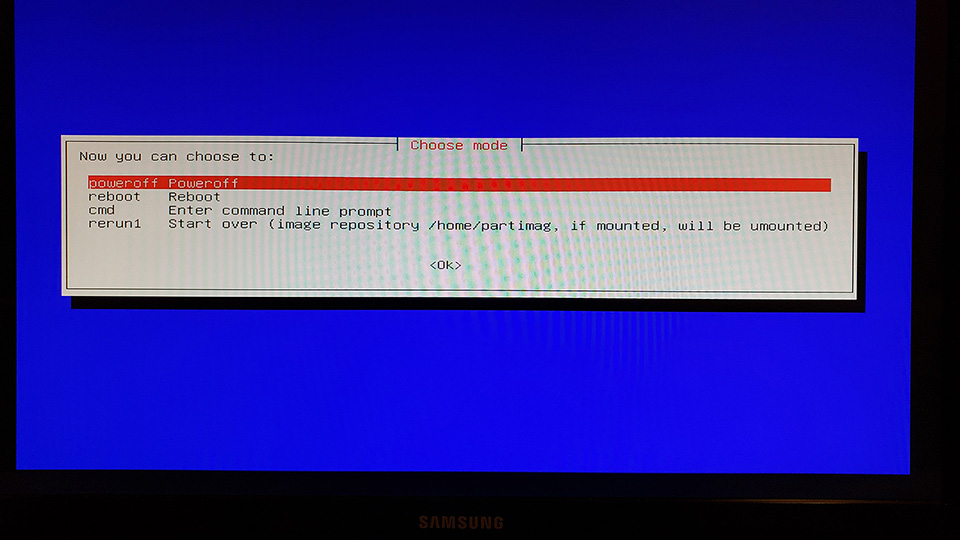
Once the cloning process is complete you should have a working copy of all the stuff (data and applications) as before. I like to shutdown the computer, unplug the USB key and make sure the TARGET hard drive boots and runs fine. Depending on what you’re doing e.g., migrating to a replacement hard drive or doing a major software update. This might be where the cloning process ends. DONE!